Hi Everyone,
It’s finally feeling like Spring so I wanted to celebrate by using the most adorable Newton’s Nook Designs’ Woodland Spring stamp set. I absolutely love this set for both its adorable images and because it combines two of my favorite things to color: critters and flowers!
Coloring
All the images were stamped onto Bristol Smooth cardstock with Ink on 3 Blackout Detail Ink and colored using Zig Clean Colored Real Brush Markers. I should also note I took a page out of Christy Gets Crafty’s book and selected my marker colors based on the pattern paper I wanted to use.

Card One
Image and Background
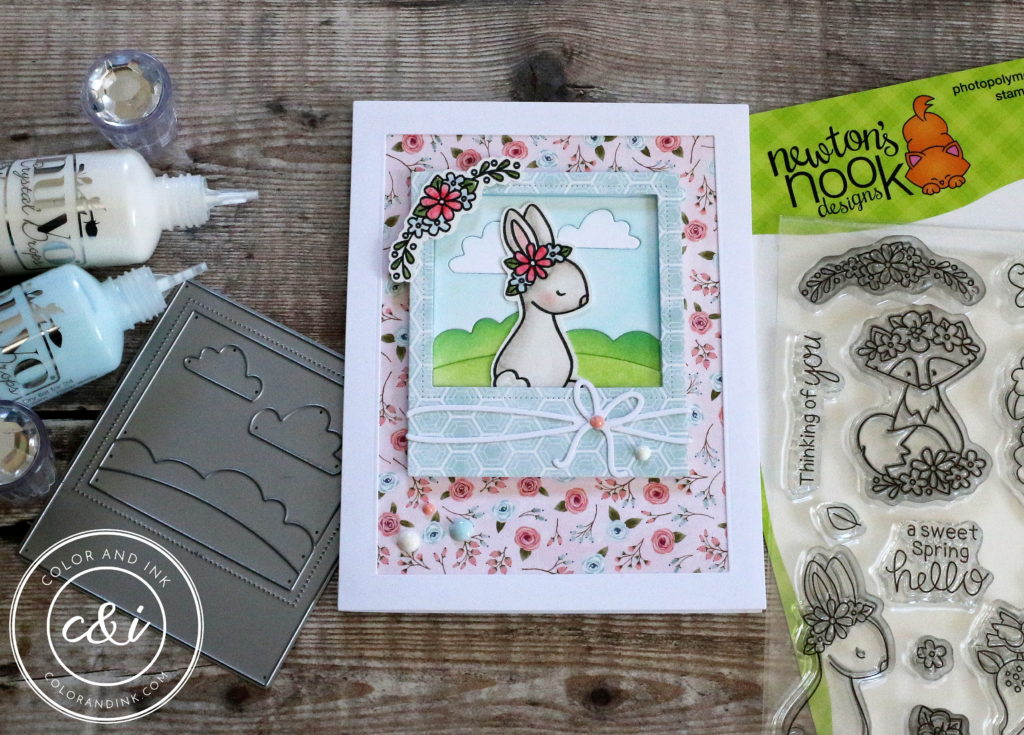
For this card, I wanted to feature the adorable bunny image. I also thought it would be fun to frame the bunny and there is no cuter frame then Avery Elle’s Photo Mat die set. I colored the different scene elements within the photo frame using Distress Oxide inks.
Assembly
I glued the floral pattern paper directly to the card base and adhered the photo mat landscape elements directly to my pattern paper. Next, I popped up the photo frame using foam tape and tucked the bunny below the edge of the frame for a more realistic look. On top of the photo frame, I added one of the flower clusters from the stamp set along with a bow I die cut using one of the dies in the Photo Mat set.
I must admit that at this point I didn’t like how bold the pattern paper was so I cut a white rectangle frame using Hero Arts’ Nesting Rectangle dies. Once I added this to the card I was so much happier.
Finishing Touches
My last finishing touch was adding Nuvo Crystal Drops in Duck Egg Blue, Simply White, and Bubblegum Blush to the card.

Card Two
Image and Background
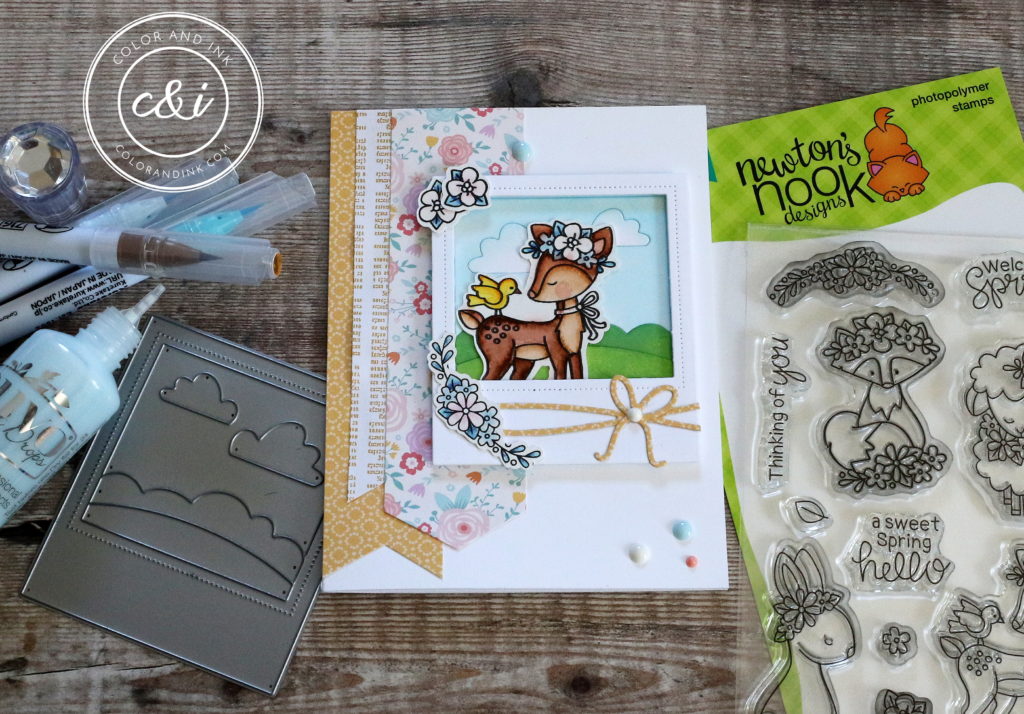
Like my first card, I decided to use the Photo Mat die set to frame the super sweet deer from the Woodland Spring set. After cutting the photo frame I colored all the scene elements again using Distress Oxide inks.
Assembly and Finishing Touches
For this card, I cut three banners using Simon Says Stamp’s Sentiment Labels Wafer Dies from pattern papers. I glued the banners directly to the card base and popped up the photo frame using foam tape. In order to tuck the deer below the edge of the frame I had to cut her down a bit – I know it’s silly but it kinda gives me the heebie-jebbies to cut animal images – I feel bad. Crazy I know!
On top of the photo frame, I added a flower cluster and two individual flowers from the stamp set. I also die cut a bow using one of the dies in the Photo Mat set.
For my final touch, I added Nuvo Crystal Drops in Duck Egg Blue, Simply White, and Bubblegum Blush.

Tags
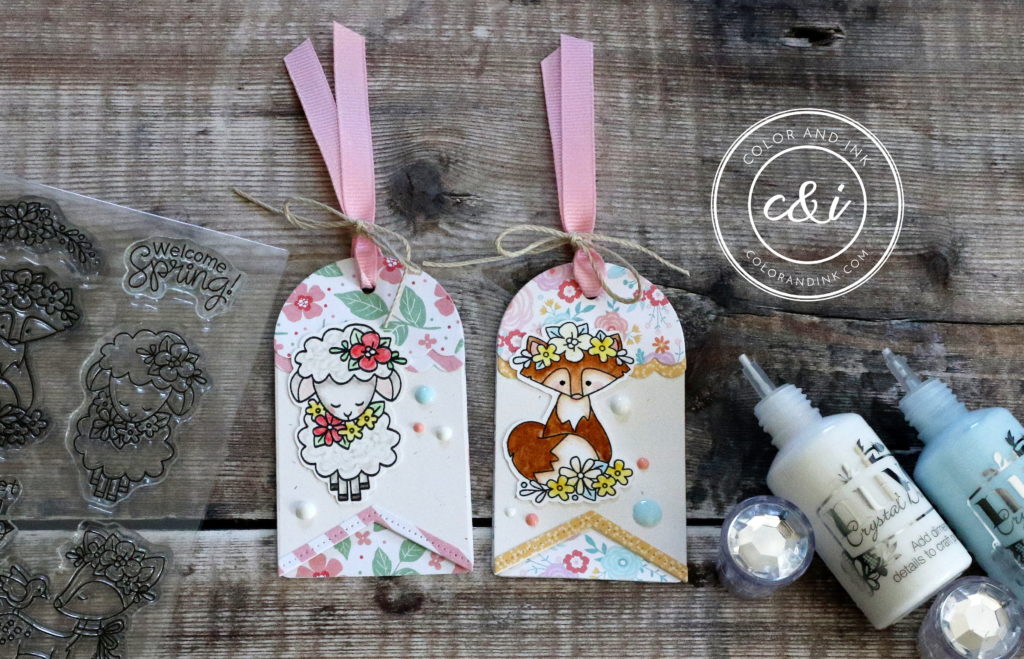
Instead of making two more cards with the other two critter images from the stamp set I thought it would be fun to make coordinating tags.
Tag Die
To create the tags I used Sunny Studio’s Build-A-Tag #1 die set. This die set along with Sunny Studio’s Build-A-Tag #2 are my all time favorite tags dies! There are several types of tags you can make and lots of extra elements in each die set allowing you to create several unique tags. If you like making tags then I think these two die sets are must-haves.
Assembly
For each tag, I cut two backgrounds one for the pattern paper and one to adhere the images to. I also cut two toppers from different pattern papers and layered them to create two rows of scallops on each tag. Lastly, I used one of the borders dies to cut a piece of pattern paper to adhere to the bottom of the top tag.
Finishing Touches
To complete the tags I added some pink and natural ribbon from my stash as well as Nuvo Crystal Drops in Duck Egg Blue, Simply White, and Bubblegum Blush. I think adding the Nuvo Drops helps tie the tags and cards together.
I hope you’re having a great start to Spring! Thanks for stopping by.

Leave a Reply